Transfer Animals from One Dairy to Another
Question: How can I transfer an animal (or a group of animals) from one dairy to another?
Answer: You can transfer animal records from one DairyComp system to another by creating a DNC file that contains all the stored information for the animals you want to transfer, and then importing that DNC file into the other DairyComp system.
You can also transfer animals in PULSE if both the sender and receiver dairies have PULSE enabled. See Transfer Animals to learn more.
The DairyComp process involves two steps, explained below:
Step 1: Create the DNC File Containing the Animals to Transfer
- On the DairyComp system that contains the animals you want to transfer, locate the animals using the SHOW command with a FOR statement, as in these examples:
- SHOW ID FOR PEN=8
- SHOW ID FOR COD1=5
- SHOW ID FOR NOTE=SELL
The system will display a list of the animals to transfer.
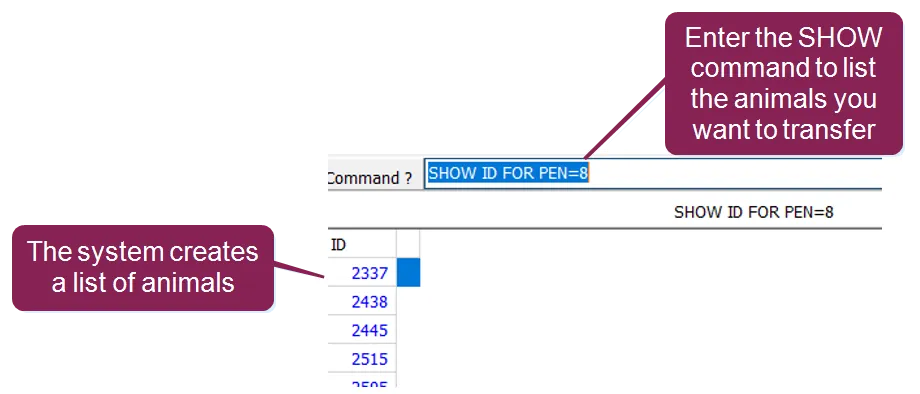
- Once you have your list, remove SHOW ID and replace it with PUTCOW\I, as in these examples:
- PUTCOW\I FOR PEN=8
- PUTCOW\I FOR COD1=5
- PUTCOW\I FOR NOTE=SELL

The system opens the Transport window, where you can enter details for the transfer (see example in the next step).
- In the Transport window, enter parameters for transferring the animals per the guidelines below, then click Start Export.
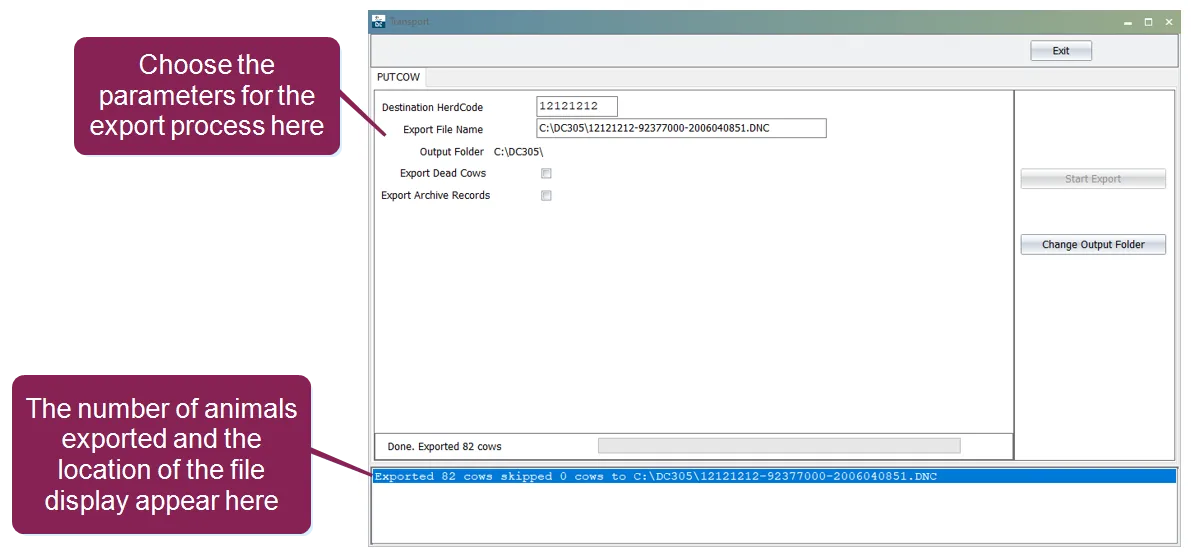
- Destination HerdCode: The Herdcode for the dairy you're moving the animal into. If you don't know the Herdcode, enter a random 8-digit number.
- Export File Name: Leave the default value for this field.
- Output Folder: The directory location for the exported DNC file. By default, the DNC file will be saved in C:\DairyComp.
- Export Dead Cows: Select to include records for dead animals.
- Export Archive Records: Select to include previous lactation records (if available).
Once the exported file is created, you'll see a confirmation message at the bottom of the Transport window, showing how many animals were included and the location where the DNC file was saved (see example above). (If you chose to export archive records, the number of animals exported will be higher.)
- Go to the folder where the DNC file was saved. You can now copy the DNC file to a USB memory stick or email it to the dairy where the animals are moving.
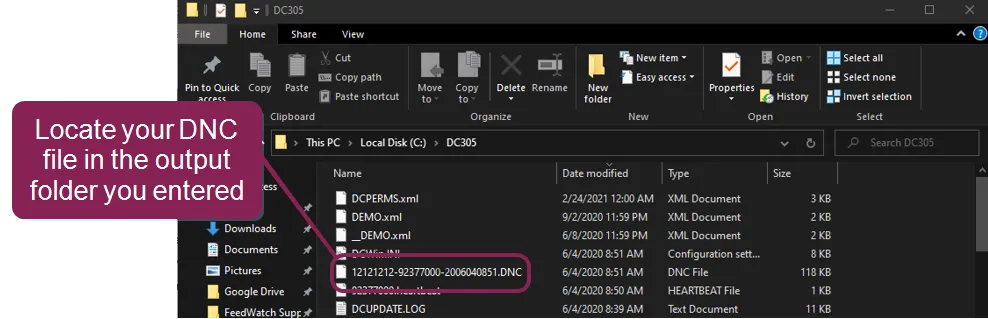
TIP: Sort files by Date Modified to easily find the latest DNC file.
Step 2: Import the DNC File into the Other DairyComp Dairy
IMPORTANT: Before importing the DNC file, you should create a backup of the existing DairyComp system you're importing into. If you're not sure how to make a backup, you can find instructions in Step 2 of the FAQ for moving DC305 to a new computerStep 2 of the FAQ for moving DairyComp to a new computer.
- Copy the DNC file that was created in Step 1: Create the DNC File Containing the Animals to Transfer into the C:\DairyComp folder for the DairyComp system you're importing the animals into.
- In the command line, enter GETCOW\I to display a list of available DNC files.
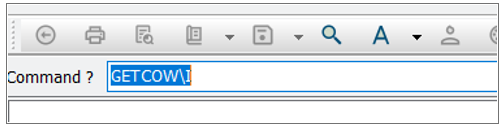
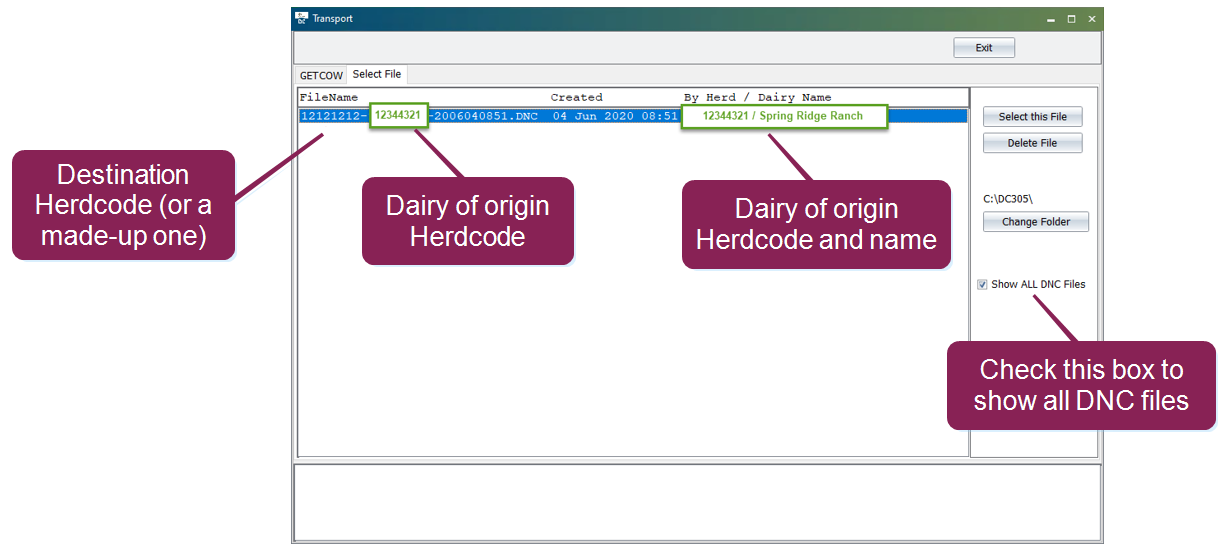
If you created the DNC file with the Herdcode for the dairy you're importing into, it will automatically appear in the list. If you don’t see your DNC file in the list, check the Show ALL DNC Files box on the right side of the Transport window to display all the DNC files in the DairyComp folder that exist with a different Herdcode. In this case, click OK to accept the message that cautions you about importing DNC files without your herdcode. If you saved the DNC file somewhere else, click Change Folder and select the appropriate location.
- Select the DNC file to import, then click Select this File to open the file in the Transport window.
- In the Transport window, click Review to display the list of animals to be imported.
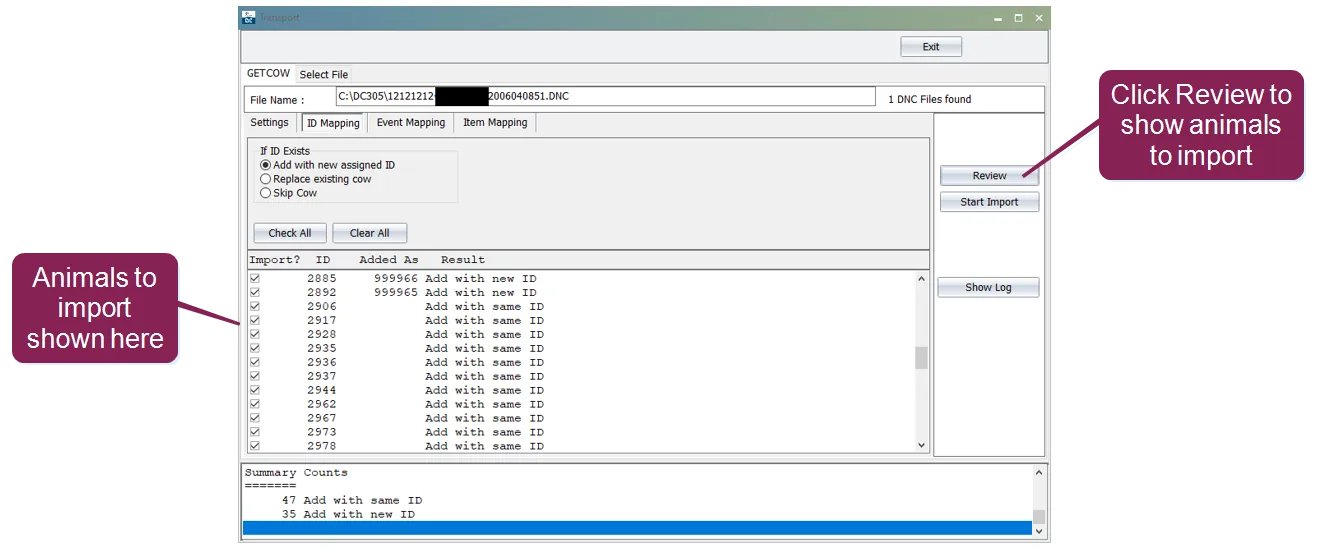
- Under the If ID Exists area, choose an option for handling animals that share the same IDs as animals already at the dairy. You can choose to add a new assigned ID, replace the existing animal, or skip them all together. If you choose to add a new assigned ID, then any duplicate animal IDs will be given a new number and displayed in the Added As column.
- To exclude any animals from being imported, uncheck their boxes in the Import? column.
- Click the Settings tab and set the following parameters.
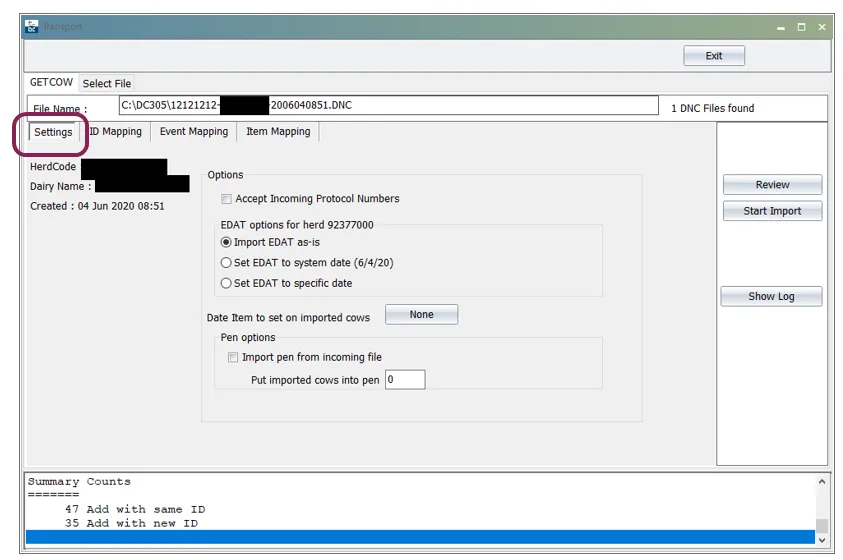
- Accept Incoming Protocol Numbers: Leave this unchecked.
- EDAT options for herd: Choose an option for the EDAT you want to assign the new animals.
- Date Item: Leave the default value of None.
- Pen options: Check the Import pen from incoming file box, or enter the number for the pen you want the animals to go into.
- Click Start Import. When the import process completes, the system displays a message indicating the number of animals imported.

Now you can display a list of the imported animals using the EDAT and PEN values you assigned them, as in this example: SHOW ID FOR EDAT=yourselecteddate PEN=yourselectedpen