RFID Scanners
IMPORTANT:
If you use RFID scanners, make sure your iOS device is compatible with your version of the mobile app:
- VAS Platform: iOS versions 18.3.2 and lower. Do not upgrade to iOS versions 18.4.0 or greater and be sure to disable automatic updates in iOS settings.
- DC on Mobile: All recent iOS versions, including 18.4.0 and above.
Android: Most low-frequency RFID scanners, including the following brands:
- Allflex
- Agrident
- Datamars
- Tru-Test
- All VAS-branded models
iOS:
- Allflex APR250 RFID scanner
- Allflex APR600 RFID scanner
- Allflex APR650 RFID scanner
- Allflex AWR300 RFID scanner
- LPR series Livestock Pocket Reader
- RS420 Series Stick Reader
The International Organization for Standardization (ISO) provides standards for the identification of animals using radio frequencies. See ISO 11784 and ISO 11785 to view these standards.
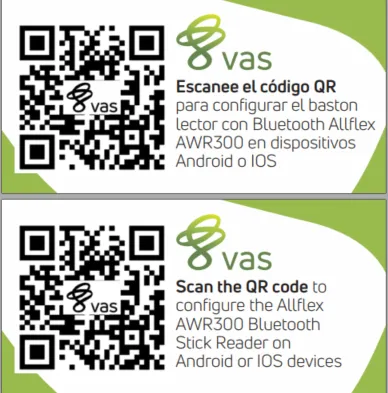
Check the back of your scanner to confirm if it was purchased from VAS. All scanners purchased from VAS have VAS Scan the QR code stickers.
You can scan animals with the mobile app after you pair and connect your RFID scanners to your device. The mobile app supports Bluetooth connections with RFID wands and scanners. However, the iOS and Android versions of the mobile app each work a bit differently with Bluetooth wands/scanners.
The RFID scanner  icon at the top left side of any screen in the mobile app shows the current connection status: a green icon indicates that the scanner is connected and a red icon
  indicates that the scanner is not connected. On the More tab, tap RFID Scanner to pair a device with the mobile app.
Expand the sections below to learn more:
IMPORTANT: If you use RFID scanners, make sure your iOS device is compatible with your version of the mobile app: VAS Platform (v1): iOS versions 18.3.2 and lower. Do not upgrade to iOS versions 18.4.0 or greater and be sure to disable automatic updates in iOS settings. DC on Mobile : All recent iOS versions, including 18.4.0 and above.
The first time you connect a scanner to an iOS device, go to your Bluetooth settings to connect it. After the first connection, your device will recognize the scanner and automatically pair and connect (as long as Bluetooth is enabled).
TIP: If you turn on Airplane Mode on your iOS device, Bluetooth is turned off automatically. You can turn Bluetooth back on in settings, and it will stay on until you turn it off or toggle Airplane Mode off and on again.
Once the scanner is paired with your device, it can scan animals in the mobile app. Tap the More button to check your scanner's connection status.
RFID Scanner: This field shows if a paired scanner is connected or disconnected. If one is currently connected, the name of the connected scanner is displayed.
Follow the steps below if you do not see the More button at the bottom of your screen.
- Tap the Back arrow at the top left of the screen until you return to one of the main feature screens.
- From there, you'll find the feature buttons at the bottom of the screen.
Make sure that Bluetooth is enabled both in your mobile device and the scanner, and then tap the More button in the mobile app to access the following scanner options.
If the scanner you want to use is already paired with your device but shows a status of Not Connected, make sure that the scanner is powered on and that the Bluetooth connection is enabled in both your mobile device and the scanner. For any scanner that shows a status of Connected, you can use it to look up animals in the mobile app to Complete TasksComplete Tasks (v2) and Enter EventsEnter Events (v2).
When pairing with available scanners, simply tap any scanner in the list that is Not Connected. If the scanner has not paired with your device yet, you may be prompted to enter a PIN to complete the pairing.
If your dairy has multiple scanners and wands, you can pair each of them with your device and then select the one you want to use within the VAS PULSE Platform mobile app.
In the Android version of the mobile app, features that support scanners, such as completing taskscompleting tasks and entering eventsentering events, offer a shortcut for using scanners.
Toggle the Scanner connection switch on or off to connect or disconnect from a paired scanner. When you toggle this switch on, the mobile app detects which scanner was last used under your account, and it connects you to it. Once the scanner finishes connecting, the mobile app displays a pop-up message to confirm that it is ready to use.
Note that in the iOS version of the mobile app, the Scanner indicator is not a switch that you can toggle. Instead, it is a status indicator that shows green when a scanner is connected and gray when it is not.
Follow the steps below if you do not see the More button at the bottom of your screen.
- Tap the Back arrow at the top left of the screen until you return to one of the main feature screens.
- From there, you'll find the feature buttons at the bottom of the screen.
If the mobile app loses connection with your scanner, check its connection status on the More menu under RFID Scanner. Expand the topics below for help understanding the connection status:
The wand name is displayed and Ready, and the connection switch is active. This means that the Bluetooth connection is active for both the mobile device and RFID wand, and both devices are powered on. The wand is connected and ready to scan data to the mobile app.
The RFID wand is paired to the mobile device but is not currently connected to the mobile app.
On Android devices, tap the RFID menu item to connect the wand, and for iOS devices, simply make sure the wand is powered on and has Bluetooth enabled. Once the wand connects to the mobile app, the connection switch is active.
On Android devices, this message appears when you tap the RFID menu item to connect the scanner. iOS devices will automatically initiate the scanner connection. In either case, the scanner typically connects quickly, so this message may be displayed only very briefly.
The fully grayed-out RFID menu item most likely indicates one the following issues:
- No wands are currently paired with the mobile device.
- The wand's Bluetooth connection is turned off.
- The mobile device's Bluetooth connection is turned off.
TIP: If you turn on Airplane Mode on your iOS device, Bluetooth is turned off automatically. You can turn Bluetooth back on in settings, and it will stay on until you turn it off or toggle Airplane Mode off and on again.
Before you scan any animals, use theRefresh Herd Data option on the More menu to pull the latest data down to the mobile app. Then, begin scanning from any tab to:
If the scanned animal's RFID is recognized and found, the mobile app displays its CowCard. You can then choose to Enter EventsEnter Events (v2) or Complete TasksComplete Tasks (v2).
OR
IMPORTANT: Only users who are assigned to a Role with Herd Write permissions can use this feature.If your account only has Herd Read permissions, you will not be able to use this feature.
If the scanned animal's RFID is not recognized, you have the option to assign it to an animal in the herd:
Tap Assign.
Look up the animal to which you will assign the RFID tag. You can find an animal by its ID, BNAME, CNTL, VISID, REG, or EID, though not all of these items may be available in your dairy.
Select which item to assign to the animal. For instance, if an animal's electronic ID (EID is replaced and no longer matches its EID in PULSE, you can assign the new value as its EID.
Tap Yes to confirm the assignment.
If you encounter an error, your dairy is not configured to assign items while scanning.
Log into the web version of PULSE and adjust the RFID ScanningRFID Scanning settings.
If your dairy uses only iOS devices, or a variety of Android and iOS equipment, you must update the wand configuration to pair it with iOS devices. You will then also need to update the configuration again if you want to switch back to pairing it with Android devices. Follow the instructions below to pair the RS420 with an iOS device and then (if necessary) switch it back to an Android device.
To reconfigure the RS420 scanner to be used with iOS devices, you'll first need to see if Menu Access is enabled. If it is not, use the AllFlex EID Tag Manager client to change the wand Menu Access setting. Then, proceed to setting the scanner to be discoverable for connection.
Test for Menu Access on the RS420 & Change if Needed
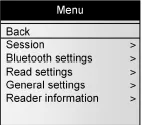
Press and hold the top (black) button on the scanner for 3 seconds to test for Menu Access.
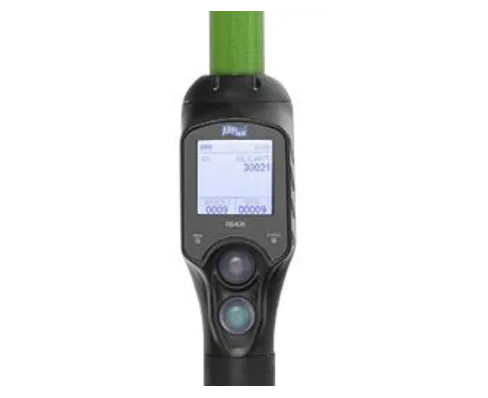
- If nothing happens, continue to step 2step 2.
- Or, jump to Manually Connect the RS420 to an iOS DeviceManually Connect the RS420 to an iOS Device if the Menu displays.
Start with the scanner disconnected from your computer. If the scanner has an active Bluetooth connection, verify that the scanner displays an S next to the Bluetooth symbol  to indicate it is paired as a Slave. This is the required setting for Android devices.
Open the AllFlex EID Tag Manager client. If necessary, download it from the Allflex website.
Connect the scanner to your computer via USB, a serial port, or Bluetooth. The client notifies you when a connection is established. For options on setting your connection, click the Connect button  .
.
Click Tools > Reader Config > Menu Access and change the setting to Enabled.
Click Apply Settings.
Disconnect the scanner from the computer.
Manually Connect the RS420 to an iOS Device
- Press and hold the top (black) button on the scanner for 3 seconds to access the menu.
- Use the bottom (green) button to arrow down to Bluetooth settings:
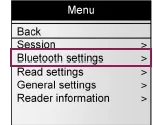
Press the top button to select the option.
- From the Bluetooth settings, choose iPhone discoverable:
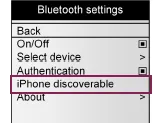
- The scanner discovers the iOS device, and displays its name and the option to connect. Select Yes.
- From the iOS device, view the Bluetooth settings to see available devices. The scanner displays as RS420_<serial number>. The scanner's serial number is located on the back of the scanner on the Allflex decal.
- Tap the correct scanner. If prompted for a password, use 1234 or 0000.
- The scanner displays a message to confirm the connection. Verify the connection on the iOS device.
- Once the scanner and iOS device are connected, the scanner displays an M next to the Bluetooth symbol
 to indicate it is paired as Master.
You should now be able to use the RS420 as a scanner with PULSE mobile app on your iOS device.
If you have reconfigured a scanner for use with an iOS device and want to return it to Android setup, you'll need to reconnect it to your Android device. See Use a Scanner with Android DevicesUse a Scanner with Android Devices for details.
To avoid having to reconfigure the RS420 when switching between device types, consider maintaining dedicated scanners for Android and iOS devices. Or, you may choose to purchase an additional, lower-cost scanner for use with the less common device type.
If you purchased your Allflex scanner from VAS, follow the steps below to connect it to your Android or iOS device.
Check the back of your scanner to confirm if it was purchased from VAS. All scanners purchased from VAS have VAS Scan the QR code stickers.
TIP: Although these pairing instructions apply to the Allflex APR250, AWR300, and APR600 scanner models, images shown are from the AWR300. Expand the sections below to learn more::::ExpandableHeading
- Before you connect the Allflex APR250 RFID scanner, Allflex AWR300 RFID scanner, or Allflex APR600 RFID scanner, download the latest firmware from the Allflex website.
- If you purchased the scanner from a third party, verify with the seller that the scanner has all of the necessary configuration files installed before you continue.
- The display is not a touchscreen; options are selected using the Arrow buttons.
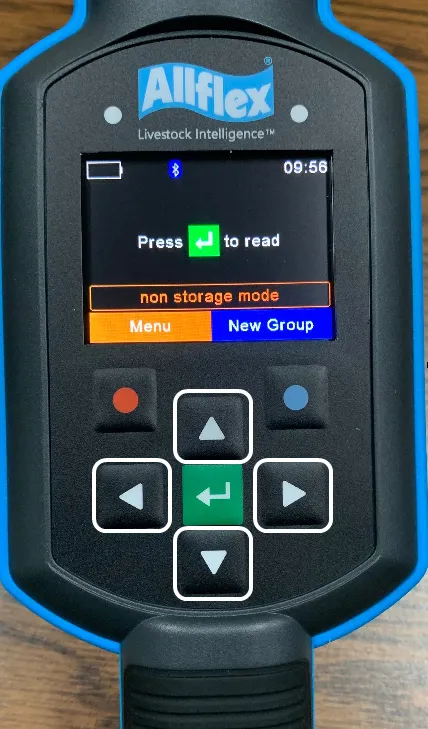
- To confirm a selection, you must press the Enter button
 . To confirm options highlighted in orange or blue, press the Red or Blue button instead.
:::
. To confirm options highlighted in orange or blue, press the Red or Blue button instead.
:::
Power on the scanner.
Press the red button in the bottom half of the display to open the Menu.
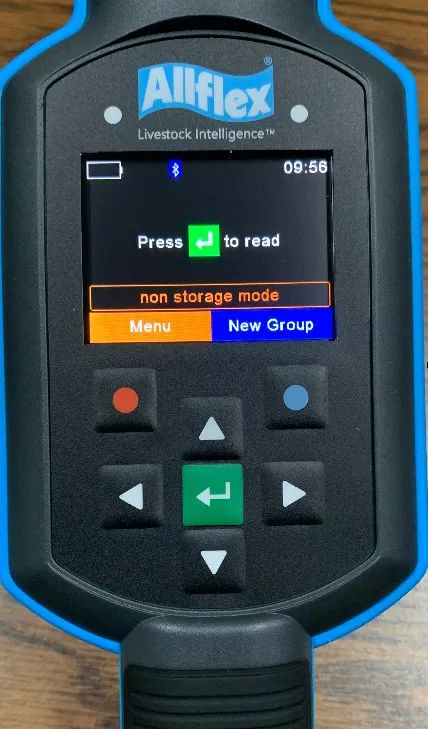
Using the arrow buttons, select Setup and press the Enter button .
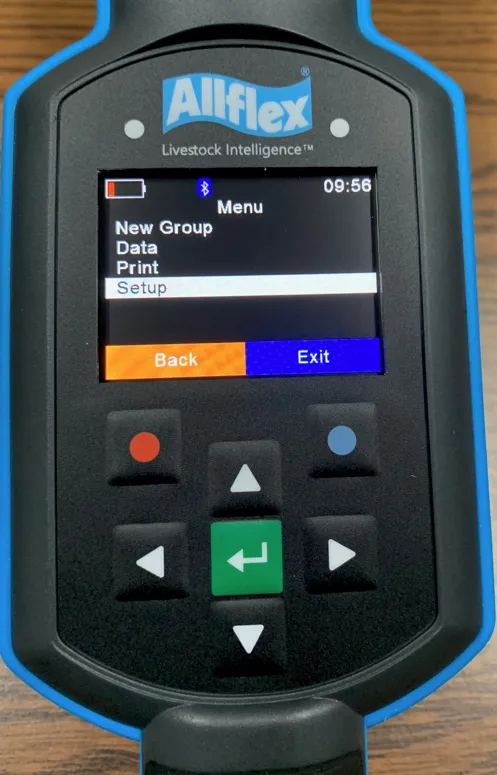
Select Interface Setup and press the Enter button .
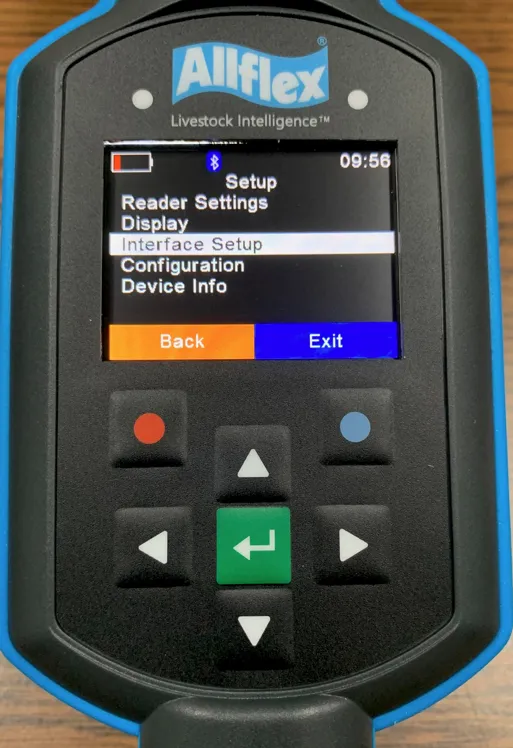
Select Bluetooth and press the Enter button .
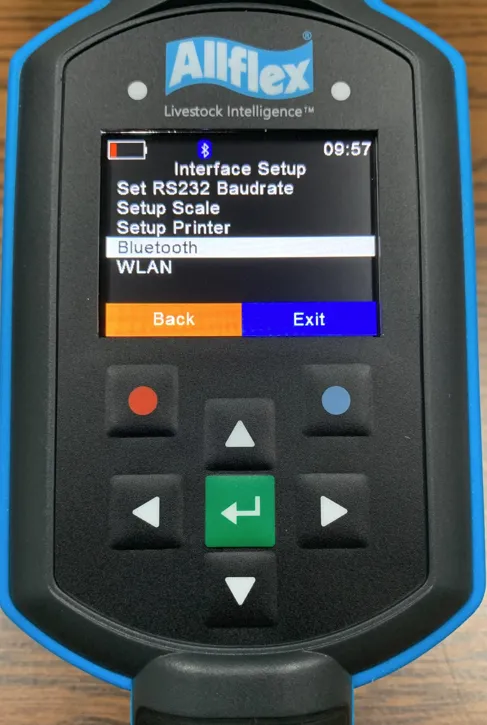
Select Set Bluetooth Mode and Enter button
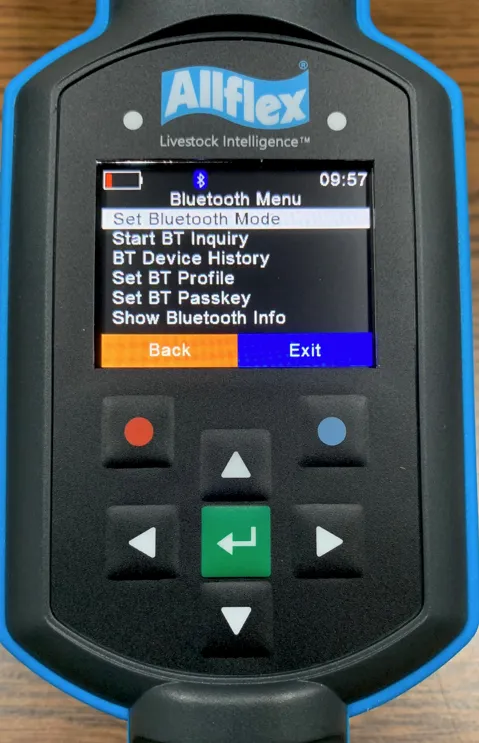
Set the Bluetooth mode for your device type.
- Select Slave Mode and press the Enter button .
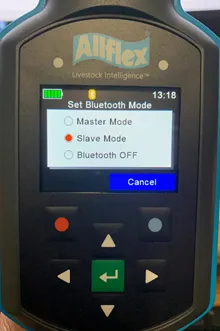
- Select Set BT Profile and press the Enter button .
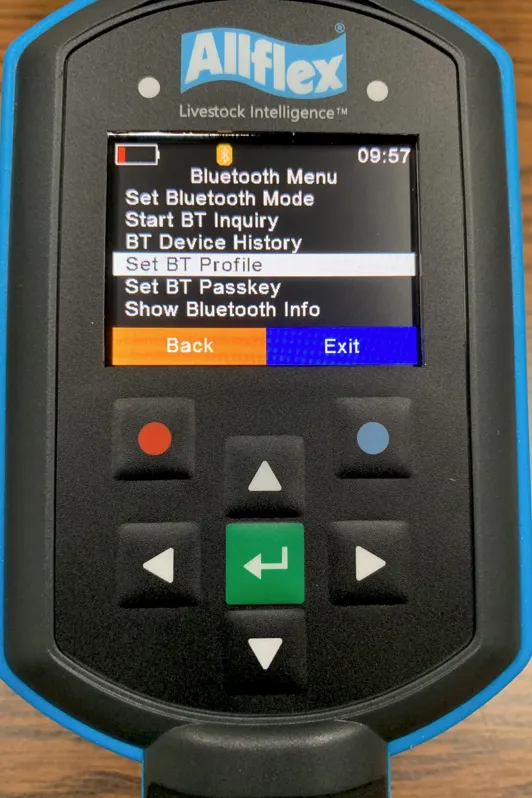
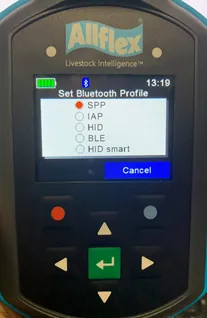
- Select SPP and press the Enter button .
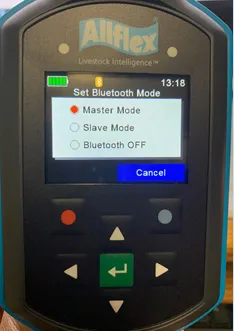
- Select Master Mode and press the Enter button .
- Select Set BT Profile and press the Enter button .
- Select IAP and press the Enter button .
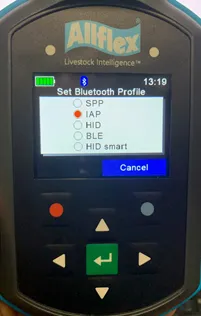
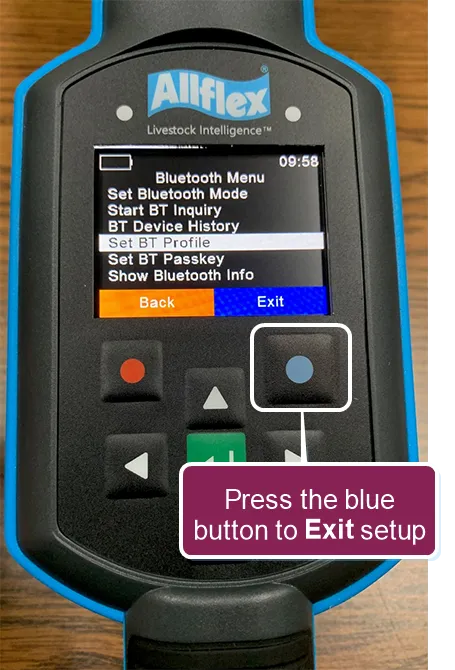
Press the blue button to Exit setup.
Press the Enter button to begin scanning.
The Tru-Test SRS2 RFID scanner is a portable hand-held device that allows you to quickly read, record, and transfer EID tag information for the animals in your herd.
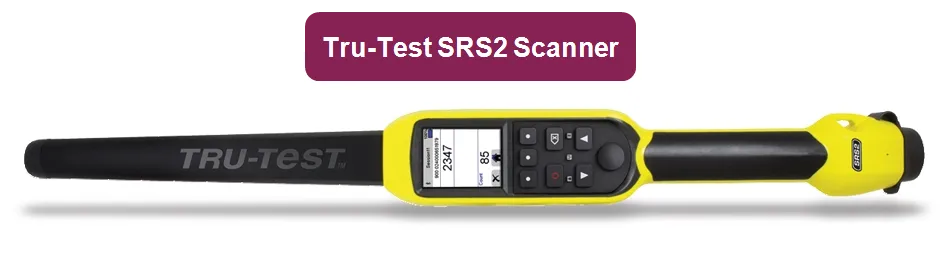
IMPORTANT: Tru-Test SRS2 RFID scanners are currently only supported in the Android version of the mobile app. Always charge your scanner to 100% before configuring settings. Expand the sections below to learn more:
Before you connect the Tru-Test SRS2 RFID scanner, download the latest firmware from the Tru-Test website.
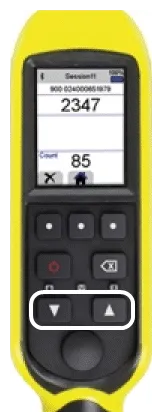
The display is not a touchscreen. You can navigate to options using the Arrow buttons.
To select an option, press the Scan button.
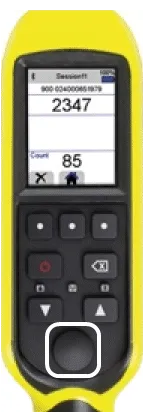
NOTE: The Scan button is also referred to as the Read and/or Select button in your Tru-Test SRS2 RFID scanner user manual.
To return to a previous menu, press the Return button.
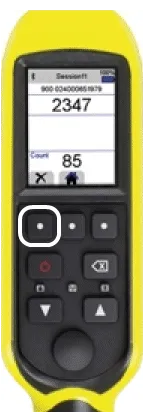
::::
::::
Follow the steps below to configure a Tru-Test SRS2 RFID scanner:
Use the Arrow buttons to navigate and press the Scan button to select Settings.
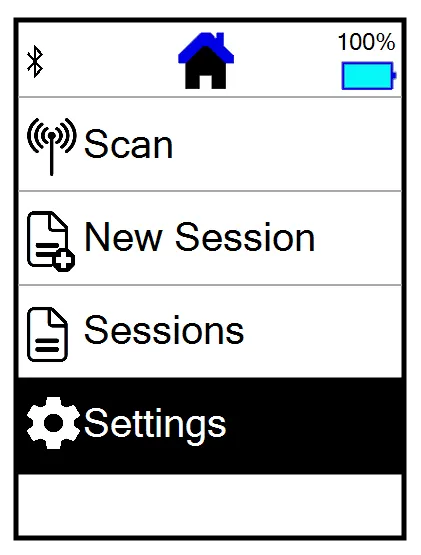
Select General.
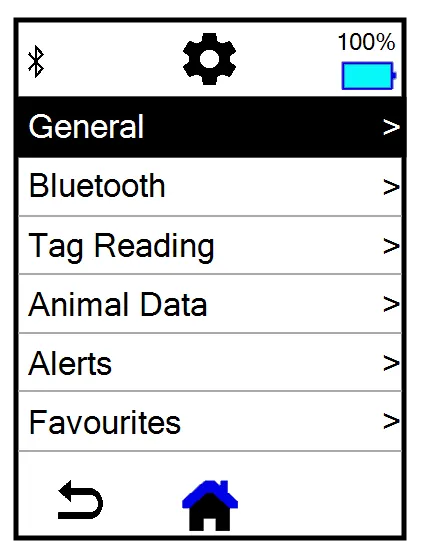
Select Date/Time.
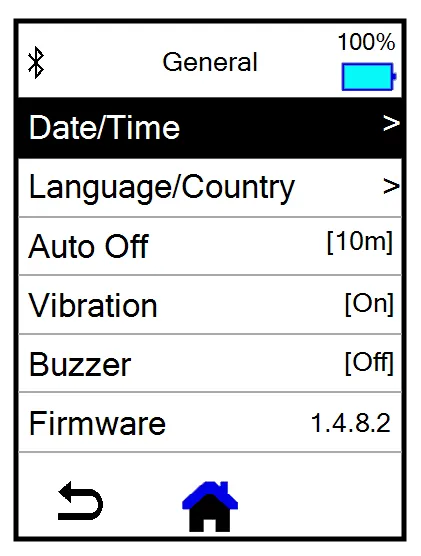
Select the current Date, Month, and Year.
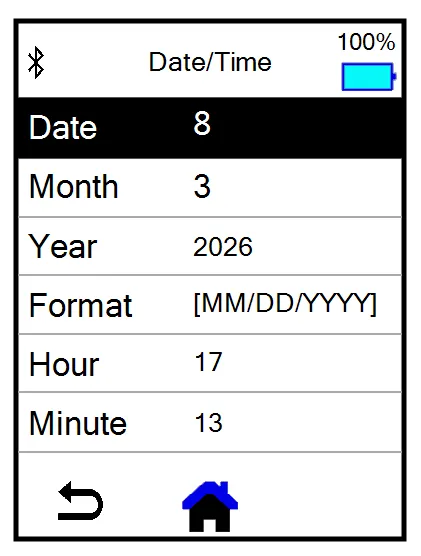
Set the Format to MM/DD/YYYY.
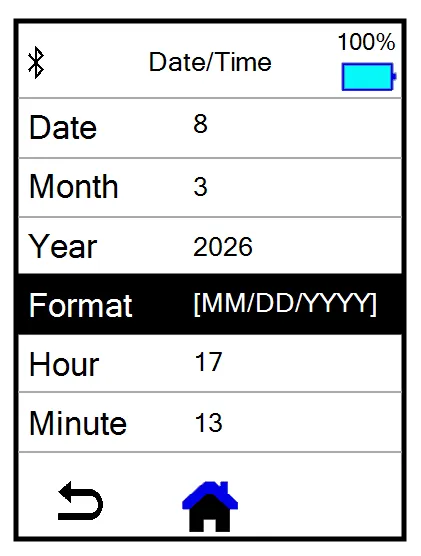
Set the Hour and Minute time settings for your time zone.
NOTE: Time settings are in military time.
Press the Return button to return to the General menu.
- Select Language/Country.
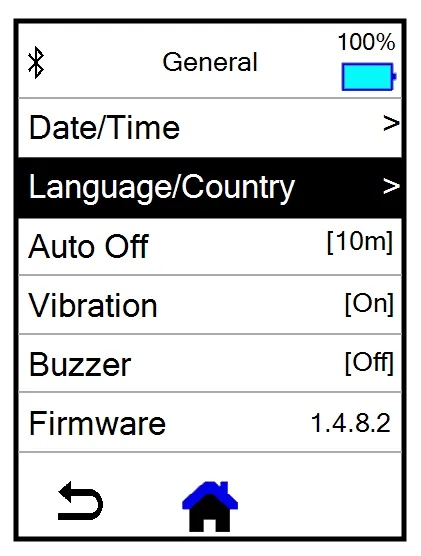
- Set Language to English.
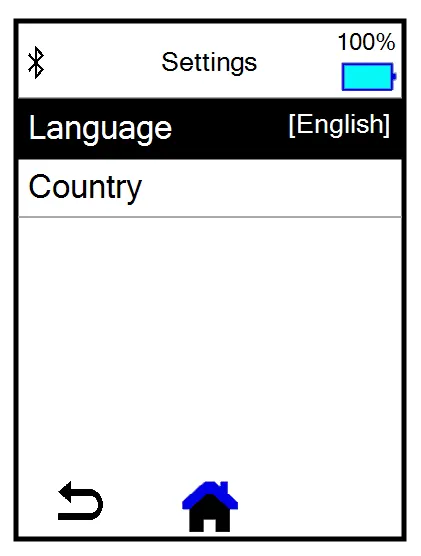
- Select your Country.
- Press the Return button to return to the General menu.
Set Auto Off to 10m.
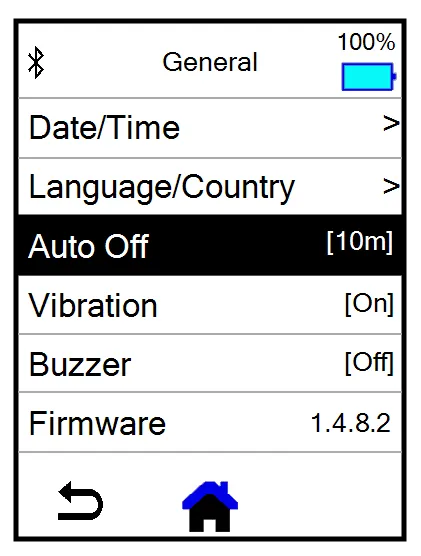
Press the Return button to return to the General menu.
Set Vibration to On.
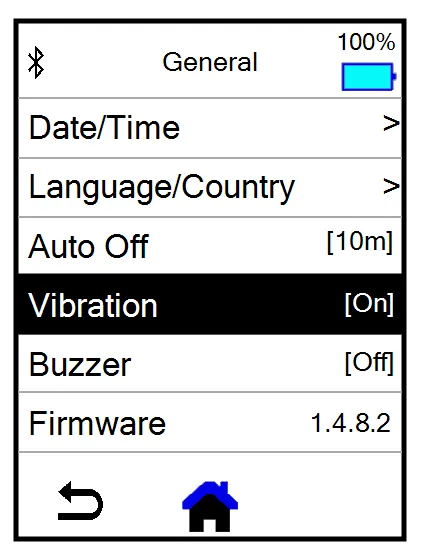
Press the Return button to return to the General menu.
Set Buzzer to Off.
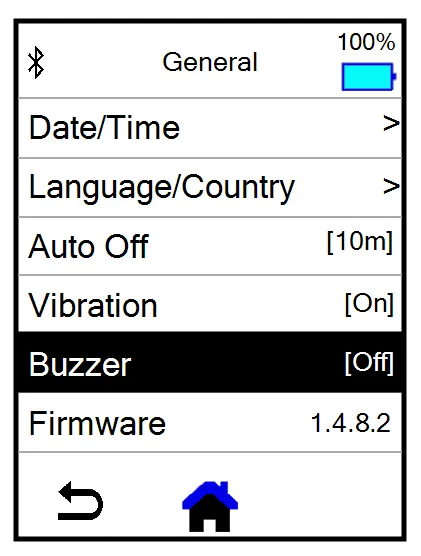
Press the Return button to return to the General menu.
Press the Return button to return to the Settings menu.
Select Bluetooth.
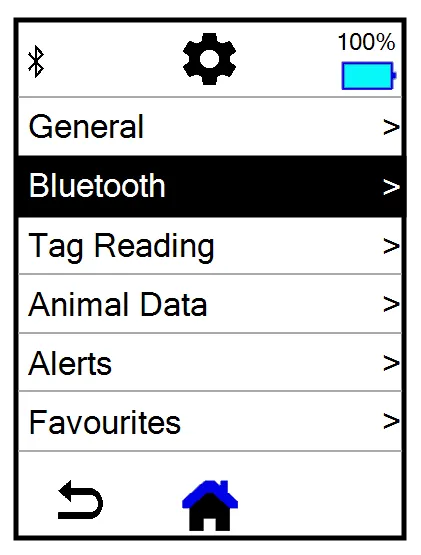
Set Bluetooth to Auto.
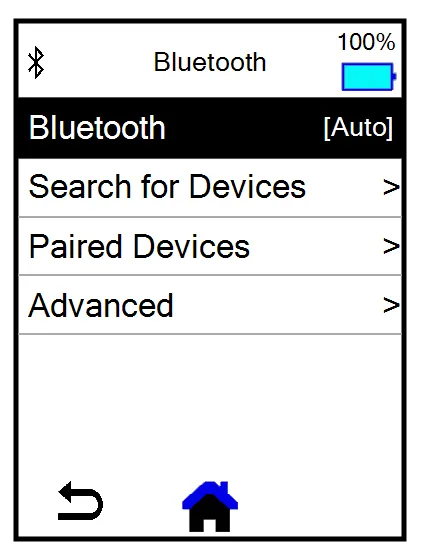
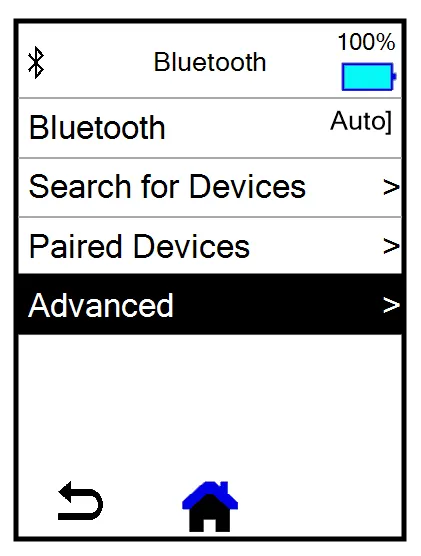
- Select Advanced.
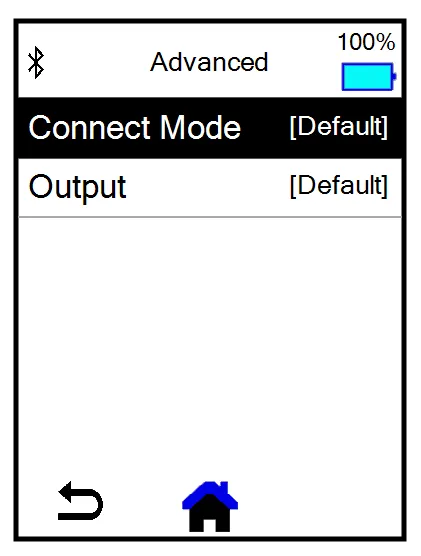
- Set Connect Mode to Default.
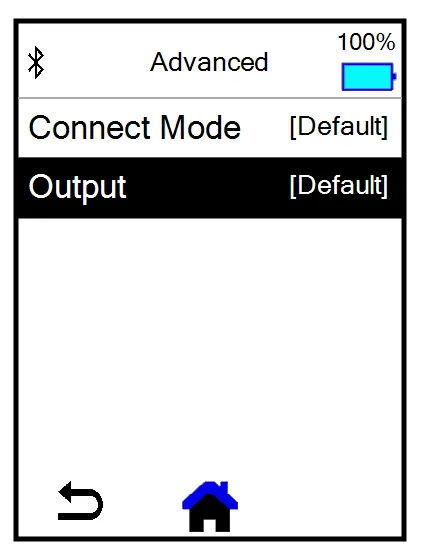
- Set Output to Default.
- Press the Return button to return to the Settings menu.
Press the Return button to return to the General menu.
Press the Return button to return to the Settings menu.
- Select Tag Reading.
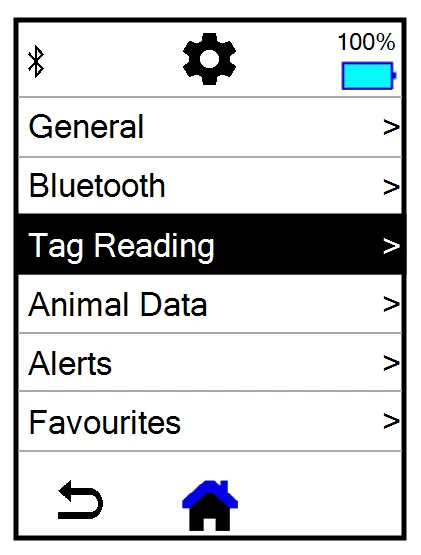
- Set Read Mode to Continuous.
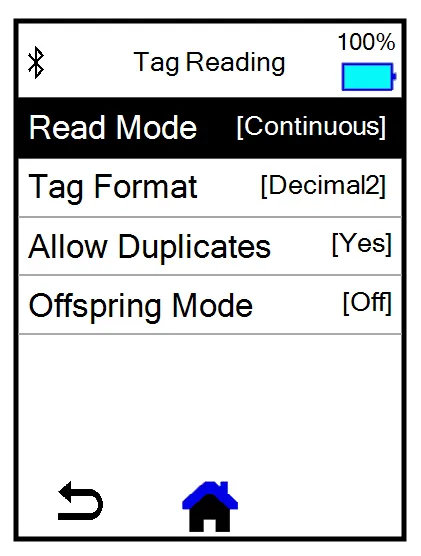
- Set Tag Format to Decimal2.
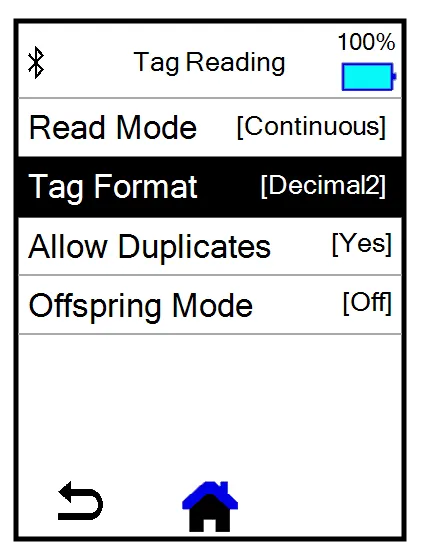
- Set Allow Duplicates to Yes.
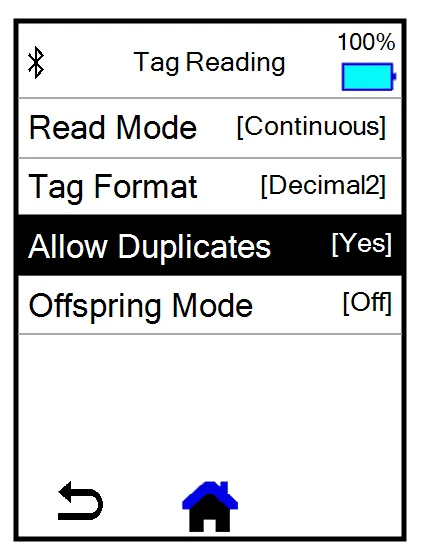
- Press the Return button to return to the General menu.
The Tru-Test SRS2 RFID scanner is a portable hand-held device that allows you to quickly read, record, and transfer EID tag information for the animals in your herd.
IMPORTANT: Tru-Test SRS2 RFID scanners are currently only supported in the Android version of the mobile app. Expand the sections below to learn more
Before you connect the Tru-Test SRS2 RFID scanner, download the latest firmware from the Tru-Test website.
The display is not a touchscreen. You can navigate to options using the Arrow buttons.
To select an option, press the Scan button.
NOTE: The Scan button is also referred to as the Read and/or Select button in your Tru-Test SRS2 RFID scanner user manual.
To return to a previous menu, press the Return button.
Follow the steps below to delete a Tru-Test SRS2 RFID scanner session:
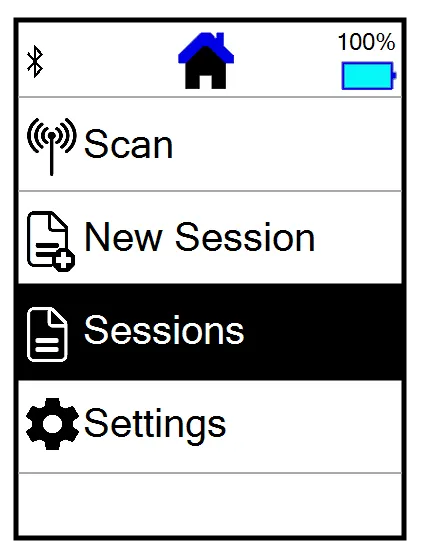
- Use the Arrow buttons to navigate and press the Scan button to select Sessions.
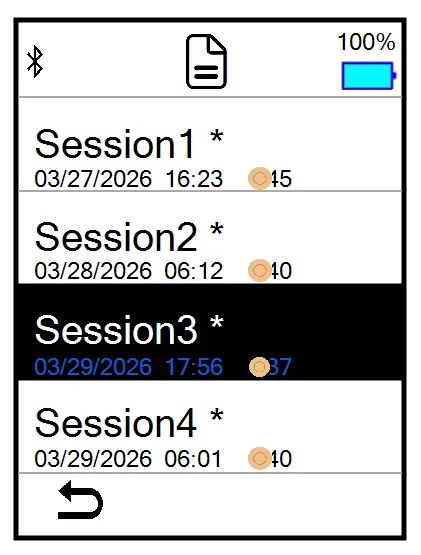
- Select a Session name.
- Select a session ID.
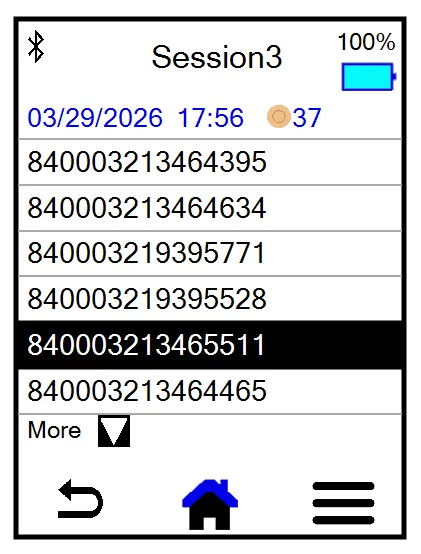
- Select the hamburger icon in the bottom right corner
 .
.
- Select Delete.
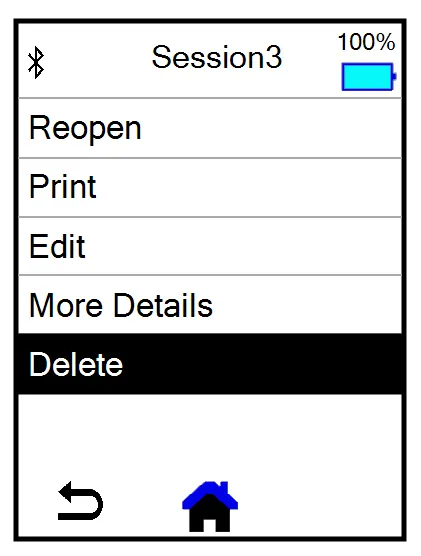
- Select the check mark icon in the bottom right corner
 to confirm the deletion.
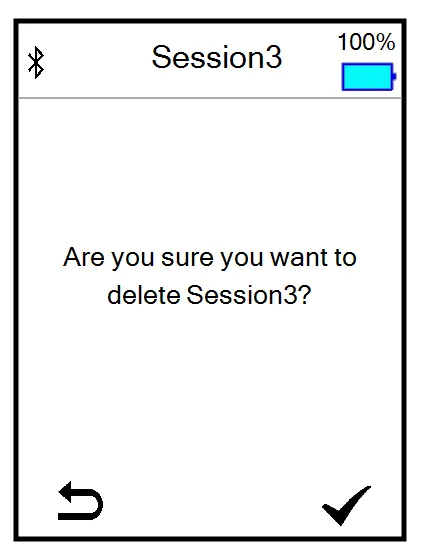
NOTE: A session holds up to 10,000 scans. When a session fills up, you'll need to start a new session to continue sending data to the mobile app.
DC on Mobile supports scanners that use Bluetooth Low Energy (BLE). If the device connecting to the app supports BLE, the device will automatically use it. Otherwise, the device will deactivate BLE and use Bluetooth Classic instead.
You may see a Bluetooth Pairing Request message or encounter some issues when you try to connect a DC on Mobile-compatible scanner to BLE. Follow the guidelines below when troubleshooting or connecting to BLE:
- Tru-Test SRS2 RFID scanner and Tru-Test XRS2 RFID scanner: If your scanner was connected to Bluetooth Classic and you try to switch the scanner connection to BLE, the app may not detect the scanner over BLE. To fix this, turn the scanner off and on. If that doesn't work, remove the scanner from your saved scanners list under System Settings and try again.
- Tru-Test SRS2i RFID scanner and Tru-Test XRS2i RFID scanner: The SRS2i and XRS2i have both BLE and Bluetooth Classic modules. iOS devices only support BLE connections with these scanners. When you first connect, the scanner enables both protocols but then disables the unused one. This can cause the BLE module not to start, and the app won't detect the scanner over BLE. To fix this, turn the scanner off and on. If that doesn't work, remove the scanner from your saved scanners list under System Settings and try again.
- Allflex APR250 RFID scanner, Allflex AWR300 RFID scanner, Allflex APR600 RFID scanner, and Allflex APR650 RFID scanner:
- To switch to BLE, follow the steps in Connect an Allflex ScannerConnect an Allflex Scanner. However, when you select Set BT Profile, tap BLE.
- When the scanner is in Master mode, you cannot change the Bluetooth profile to BLE. You must switch to Slave mode in order to use BLE.